· tutorials · 6 min read
Clone Quotes In Salesforce Part 2
Enhance Salesforce quote cloning with Flow. Learn to reparent quotes, select line items, & bulkify for better performance.
Cloning quotes is out-of-the-box functionality that is missing. The inability to copy custom field data between new quotes inside of Salesforce slows down user workflow. Many Salesforce users reached out to me after initially writing about this topic, with ways they wanted to improve the way quotes are cloned within Salesforce. In this article, we explore how to further customize and optimize cloning quotes in Salesforce using Flow.
List of Improvements
- Reparent Quote
- Selecting Quote Line Items
- Bulkification
Reparent Quote
Some users want to associate their quote to a new opportunity. This process is often referred to as reparenting. This can only occur before the quote is created. We can query opportunity data from Salesforce, and allow the user to filter and select the desired opportunity. Thanks to the Summer ‘23 release, this is now easy! We will be showcasing the new ability to search records in a data table.
To start, add a Get Records element with the following properties:
- Label:
Get Opportunity - API Name:
Get_Opportunity - Object:
Opportunity - Conditions:
IdEquals{!Get_Quote.OpportunityId} - How Many Records to Store:
All Records
Even though only 1 record is returned with this filter criteria, it is important to store this as a collection. This is because data tables only interact with data collections, and not individual records.

This opportunity will be used to set the default value of the opportunities you are looking to reparent.
Additionally, we want to query the potential opportunities that will be reparent to. Keep in mind that quotes are connected to opportunities, and not accounts, so there is no need to connect to the account. Additionally, there are a few limitations with displaying data in data tables. There is a maximum of 1500 records that can be displayed, so it may be necessary to filter down opportunities more based on your use-case.
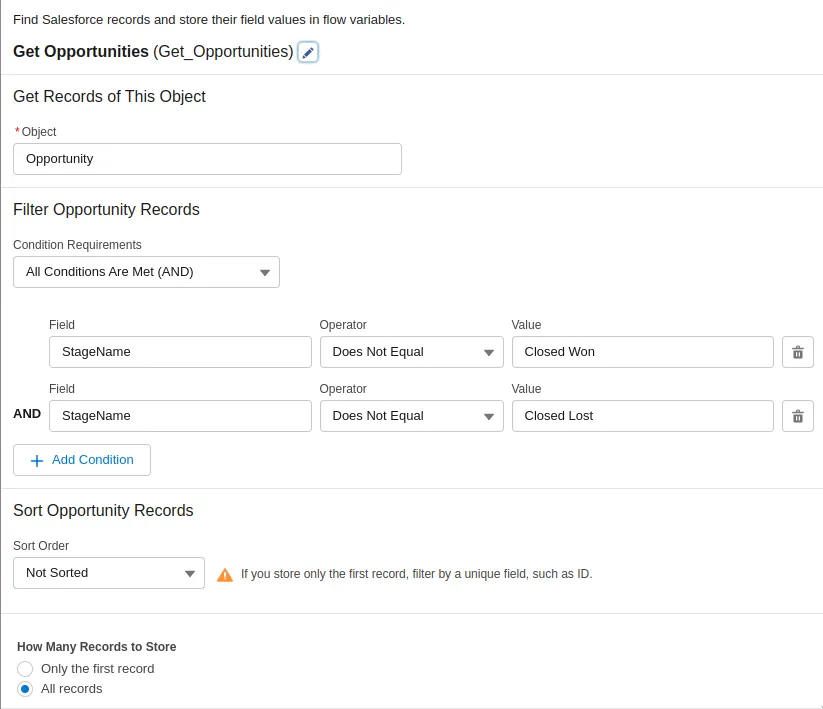
To get the opportunities to select from, add an element Get Records with the following properties:
- Label:
Get Opportunities - API Name:
Get_Opportunities - Object:
Opportunity - How Many Records to Store:
All Records
For the filters, this is what can be changed based on your needs, for the sample, we will use the following:
StageNameDoes Not EqualClosed WonStageNameDoes Not EqualClosed Lost
Now that we have collected the data, it’s time to pass this into a UI component, so the end user can select the opportunity.
Add a Screen element after the Get Opportunities element to get user input. Use the following configuration:
- Label:
Select Opportunity - API Name:
Select_Opportunity
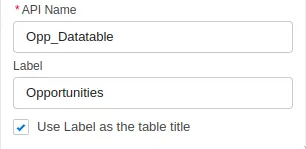
Add a Data Table with the following properties:
- API Name:
Opportunity_List - Label:
Opportunities - Use Label as the table title:
True
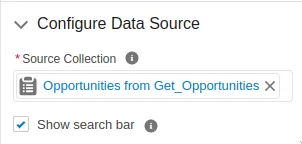
Configure Data Source
Add {!Get_Opportunities} as the Source Collection. Additionally, because of the Summer ‘23 update, it is now possible to search through the data. All that is needed is to mark Show search bar as True.
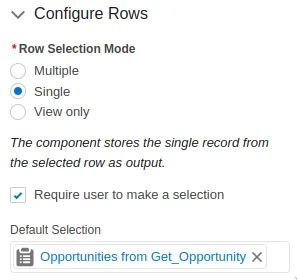
Configure Rows
Row Selection Mode: Single Require User To make a selection: True Default Selection: {!Get_Opportunity}
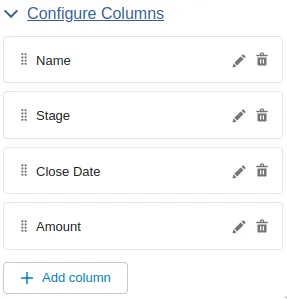
Configure Columns
There is flexibility around what columns to display to end users. I recommend at a minimum the following fields:
- Name
- Stage
- Close Date
- Amount
Additionally, I would recommend creating a formula field to store the account name.
Mapping User Input Data to Resources
Last, we want to map the user selection back to data inside the flow. We can accomplish this with one additional resource. Create the following resource:
Resource Type: Variable API Name: SelectedOpportunity Data Type: Record Object: Opportunity
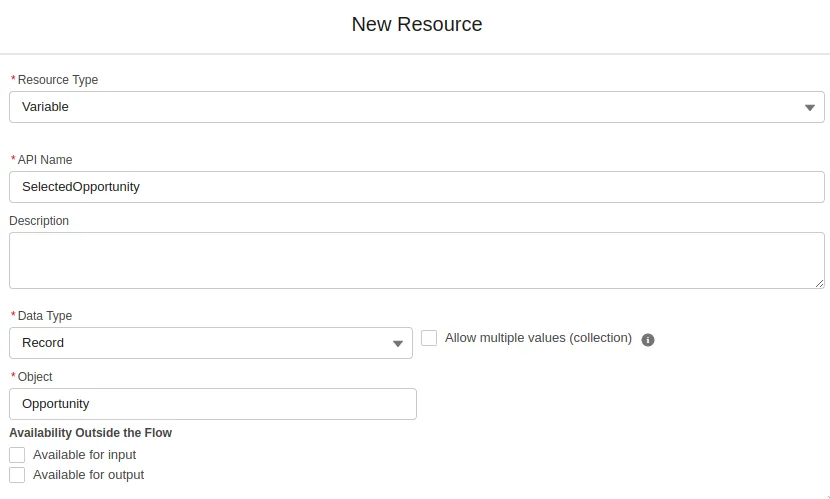
This will allow us to map the selected record from the datatable to a resource, and interact with the data within the flow.
Inside the data table from the Select Opportunity screen, go to the Advanced section and add the following:
- Manually assign variables:
True - First Selected Row:
{!SelectedOpportunity}
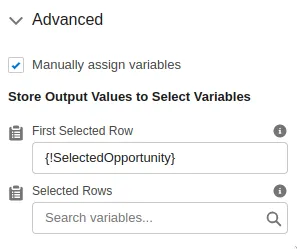
This ties the user input back to a resource that can be passed through to data in later steps. We can pass this opportunity’s id to the quote by editing the Create Quote element, and change the OpportunityId assignment to {!SelectedOpportunity.Id}
And that is all that is needed to reparent quotes within the quote cloning process.
Selecting Quote Line Items
Sometimes when cloning a quote, it is ideal to only clone a subset of the original quote line items. Ideally, a user can select what quote line items to bring over to the new quote. To perform this, we can use a screen flow to show the line items, and select accordingly.
Adding a screen flow
Add a Screen element with the following properties:
- Label:
Select Quote Line Items - API Name:
Select_Quote_Line_Items
Additionally, we will want to add a Data Table with the following properties:
- API Name:
QLI_Data_Table - Label:
Quote Line Items - Source Collection:
{!Get_Quote_Line_Items}
Configure Columns
Using data tables does not show complex fields like lookups in the standard field. Instead, we need to create a field Product Name, to display the product name on the Data table.
Create a field on the Quote Line Item with the following properties:
- Type:
Formula - Formula Return Type:
Text - Field Label:
Product Name - Field Name:
Product_Name - Formula:
Product2.Name
Now that the field is created, add the following columns in the data table to display to the end user:
- Product Name
- Quantity
- List Price
- Total Price
Assign Output
To bring inputted data from the user into the flow, we need to assign this to a resource. Inside the Advanced section of the data table, use the following configuration:
- Manually assign variables:
True - Selected rows:
{!Get_Quote_Line_Items}
This will take all quote line items selected, and
Bulkification
Many people commented on the sin of having dml in the for loop. While this is a good hacky way to get something out the door, it is not best practices. We can improve this by adding records to a collection.
First, create a collection with the following properties:
- Type:
Variable - API Name:
New_Quote_Line_Item_Collection - Data Type:
Record - Object:
Quote Line Item - Allow multiple values (collection):
True
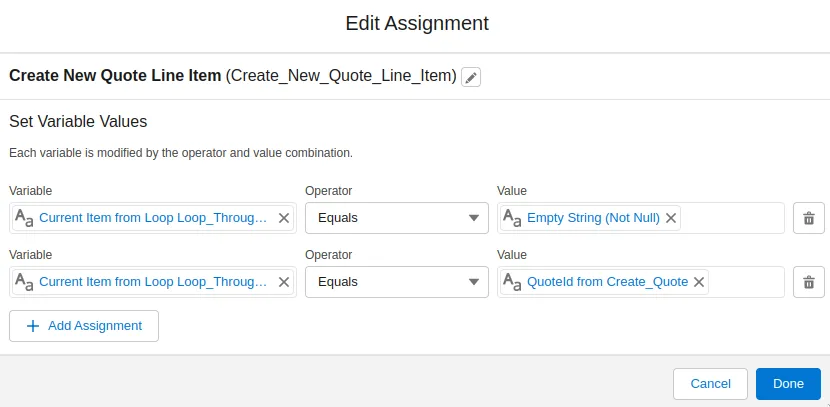
Create an Assignment element with the following properties:
- Label:
Create New Quote Line Item - API Name:
Create_New_Quote_Line_Item
Additionally, we will want to set the following variables:
{!Loop_Through_Quote_Line_Items.Id}equals{!$GlobalConstant.EmptyString}{!Loop_Through_Quote_Line_Items.QuoteId}equals{!Create_Quote}
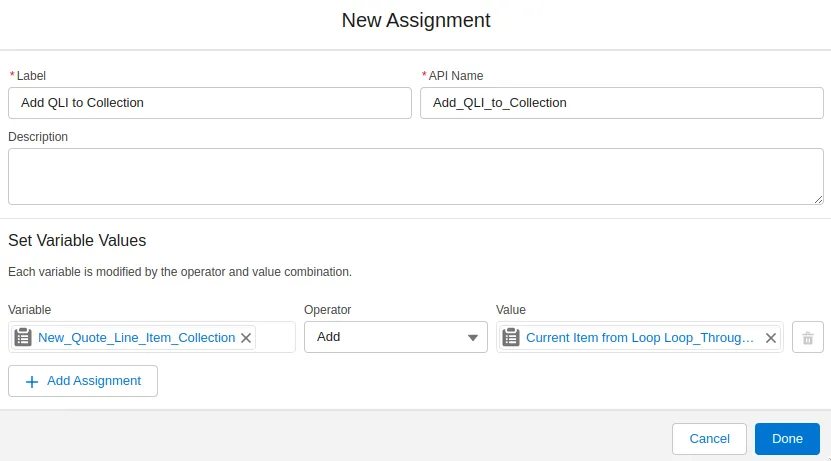
Additionally, we will want to add these new records to the newly created collection. This can be accomplished using the Assignment element with the following properties:
- Label :
Add QLI to Collection - API Name:
Add_QLI_to_Collection
Additionally, the variable assignment with the following:
{!New_Quote_Line_Item_Collection}Add{!Loop_Through_Quote_Line_Items}
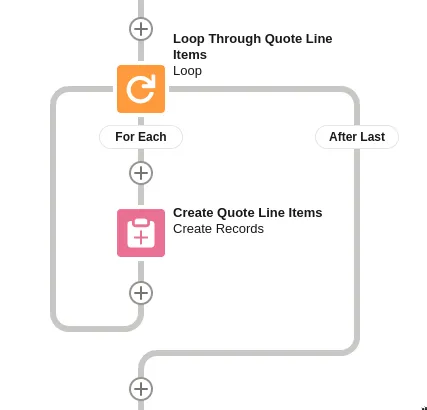
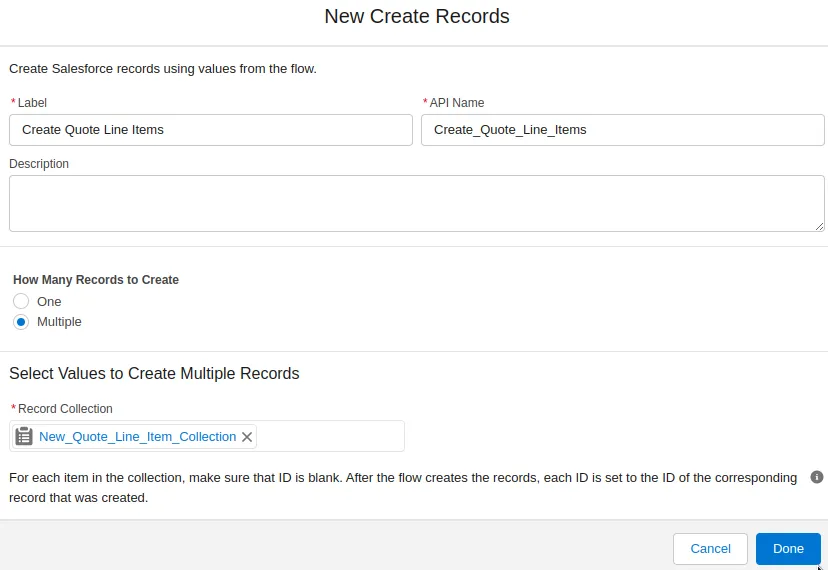
Now, we can delete the Create Records element, move it out of the flow, and tie this to the new record collection. Add a Create Records element with the following properties:
- Label:
Create Quote Line Items - API Name:
Create_Quote_Line_Items - How Many Records to Create:
Multiple - Record Collection:
{!New_Quote_Line_Item_Collection}
Now, the flow should look like the following:
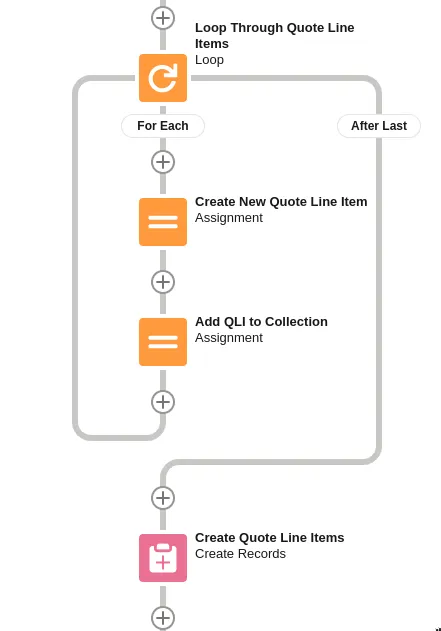
Final Thoughts
Cloning quotes inside of Salesforce is still a much-needed feature for most users. With flow, we can easily mimic and extend the functionality of a cloning button to speed up data input in the CRM.
If you want to see the video tutorial, check out the video below:
Need Our Help To Get Your Data Into Salesforce?
Join dozens of other companies by learning how you can get all your company's data in one place.