· tutorials · 6 min read
Dropbox ➡️ Salesforce Integration Tutorial | Zapier
Learn how to import records from a spreadsheet and import into Salesforce. All automated using Zapier.
Loading data into Salesforce is a challenge for most businesses. Tasks such as formatting data, recreating mapping files, and gathering documents are tedious, time-consuming, and error-prone. Automating data loads can significantly reduce errors in mappings and free up time for more important work. If you find yourself frequently uploading data into Salesforce with the same header file, this task can be easily automated. With tools like Zapier and Dropbox, you can seamlessly upload files to the cloud and load them directly into Salesforce, even with Salesforce Professional Edition, without the need for any Apex code.
What Should Importing Data Look Like?
Importing data into Salesforce should be as seamless as possible. With this integration, drop your files into Dropbox and see your data inside of Salesforce in minutes.
Requirements
To make this integration work, you will need the following software and plans:
- Dropbox account
- Zapier Starter Plan
- Salesforce Professional Edition
How to Format the Data
The files to import should have a similar structure. The column headers need to have the same names for every import. Additionally, all field data should be formatted for importing into Salesforce. For example, if you are importing data into a field like Close Date, the data should be in the format YYYY-MM-DD, or 2023-06-04.
Dissecting the CSV
CSV files are the backbone of any Salesforce data load. They are widely used to store data from exports due to their ease of parsing and industry-standard nature. In a CSV file, the first row typically contains the headers, which can be used to map data from the CSV file to Salesforce fields. Each subsequent row represents a unique record to be imported into the system.
Can XLSX or XLS files be used?
Microsoft Excel has its own proprietary format for Excel sheets, represented by .xls or .xlsx file extensions. The format used depends on the Excel version, but .xlsx is more common today. Although .xlsx files can be read outside of Microsoft Excel, parsing them in a readable format is more challenging compared to CSV files. Moreover, due to limitations with Zapier, parsing Excel files becomes extremely difficult. Therefore, it is recommended to use .csv files. If you are working with .xlsx or .xls files, you can easily convert them to .csv using software like Microsoft Excel or Google Sheets through a simple export.
Dropbox Configuration
To streamline and connect data from Dropbox, we need a designated folder to store the files used for uploading. In this example, we’ll use the folder Salesforce Import.
Setting up the Zap
To bring file contents from Dropbox to Zapier, you can utilize the Dropbox connection.
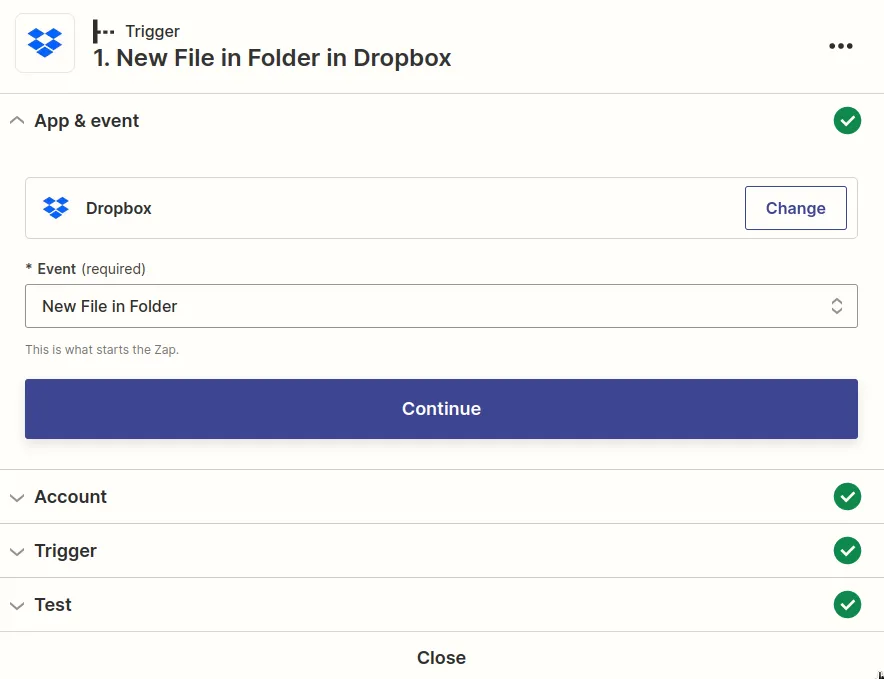
Follow these steps to create a new Zap named “Dropbox -> Salesforce Integration”:
- Choose the event
New File in Folder. - Select the Dropbox account you used in the previous step.
- Choose the folder you created earlier.
- Ensure that the file contents are included.
- Test the connection to verify its functionality.
Now you can view the imported files in Zapier. By selecting the File A dropdown, you can change the file content and view recent files created in the folder. Additionally, you can access data about the file, such as file_name and file_text, in Dropbox. Next, let’s extract the file data.
Parsing CSVs in Zapier
Parsing data from a CSV in Zapier requires the use of a code action. This action provides more control and precision over the data that needs to be formatted for Salesforce. Add the action Code by Zapier with the event Run Python.
Understanding the Code Action In Zapier
The code action in Zapier consists of three parts:
- Input Data
- Code
- Output Data
Each component functions as follows:
Input Data
The input data passes data from previous actions (in this case, the Dropbox action) to the code section. Above the code section, there is a menu above the code section where you can map data from previous steps to a key in a dictionary. For example, if you want to use the file name in the code section, you can call the variable ‘File Name’ and map it to the file name from Dropbox. This data is passed to a Python dictionary, and the file name can be accessed using input_data['File Name'].
Code
The code section allows you to manipulate the data using Python code. Zapier’s flexibility shines here, as you can format and manipulate the data to meet your precise needs. However, only standard libraries can be used in this section, so libraries like Pandas and NumPy are not available.
Output Data
The output data is the data that can interact with other connection steps. While you can format the output data in any way necessary for your integration, there are two major Python structures relevant to Zapier: lists and dictionaries. If the output data is in the format of a dictionary, the keys can be used in subsequent connection steps. For example, if the output data is output_data['Name'] = 'Justin', you can map the data from Name in a later step. If the output data is in the format of a list, Zapier processes each row of data individually. For instance, if the output data is [1,2,3] and the next step sends an email for each row, the end user will receive three emails. Additionally, these two data types can be combined, such as a list of dictionaries. We will explore this further using code later on.
Configuring the Code Block
Now that you have a deeper understanding of how code is executed in the Zapier platform, let’s set up the integration to parse the data.
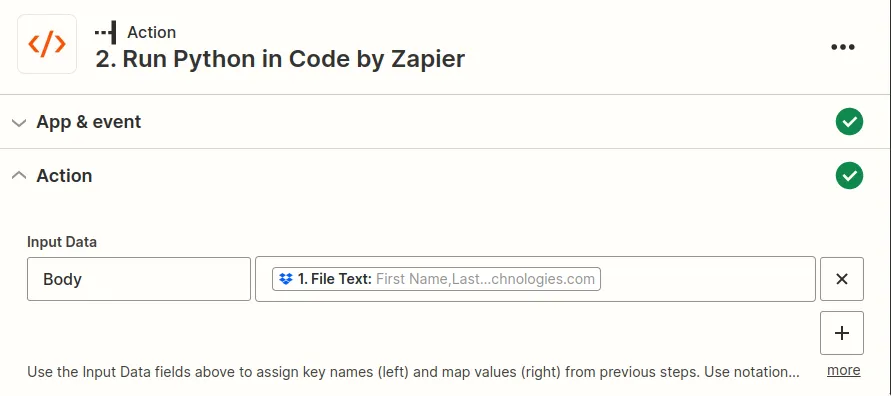
First, pass the file text through the input data using the key Body and the File Text from the Dropbox data.
Next, insert the following code:
import csv
from io import StringIO
return_array = []
headers = []
f = StringIO(input_data['Body'])
reader = csv.reader(f, delimiter=',')

for row in reader:
    # Mapping the header row
    for col in row:
        headers.append(col)
    break

for i, row in enumerate(reader):
    returnRow = {}
    for j, col in enumerate(row):
        returnRow[headers[j]] = col
    return_array.append(returnRow)

return return_array
This code will parse the CSV data and map the column names to data values for each row. It provides an easy way to format the data for use in the next steps.
Loading Data into Salesforce
The final step is to load the parsed data into Salesforce. We’ll want to load data into the desired object. In this example, we will use the lead object.
Add the Salesforce action to your zap. Since the goal is to create a new record, ensure that the event Create Record is selected. Under the Action section, select the object you are looking to map data to. In this example, we are using the Lead object. From here, all that is needed is mapping the column names from the CSV file to your fields inside of Salesforce.

And that’s everything! Activate the zap and starting adding new csv files to your Dropbox folder.
Final Thoughts
Using a Dropbox -> Salesforce integration enables easy and automated file uploads for Salesforce users. It saves time and money by providing a simple interface for importing records. Additionally, it simplifies the record import process for users who are not familiar with complex data loads.
If you want to see the video tutorial, check out the video below:
Need Our Help To Get Your Data Into Salesforce?
Join dozens of other companies by learning how you can get all your company's data in one place.